
The files for this print are available here.
The code for this post is available here.
If you aren’t familiar with coprocessing, it involves modifying a 3D printed job as it is being manufactured to produce integrated content. I’ve used coprocessing in the past to generate some pretty fun things, but in my opinion this recent print has been the coolest.

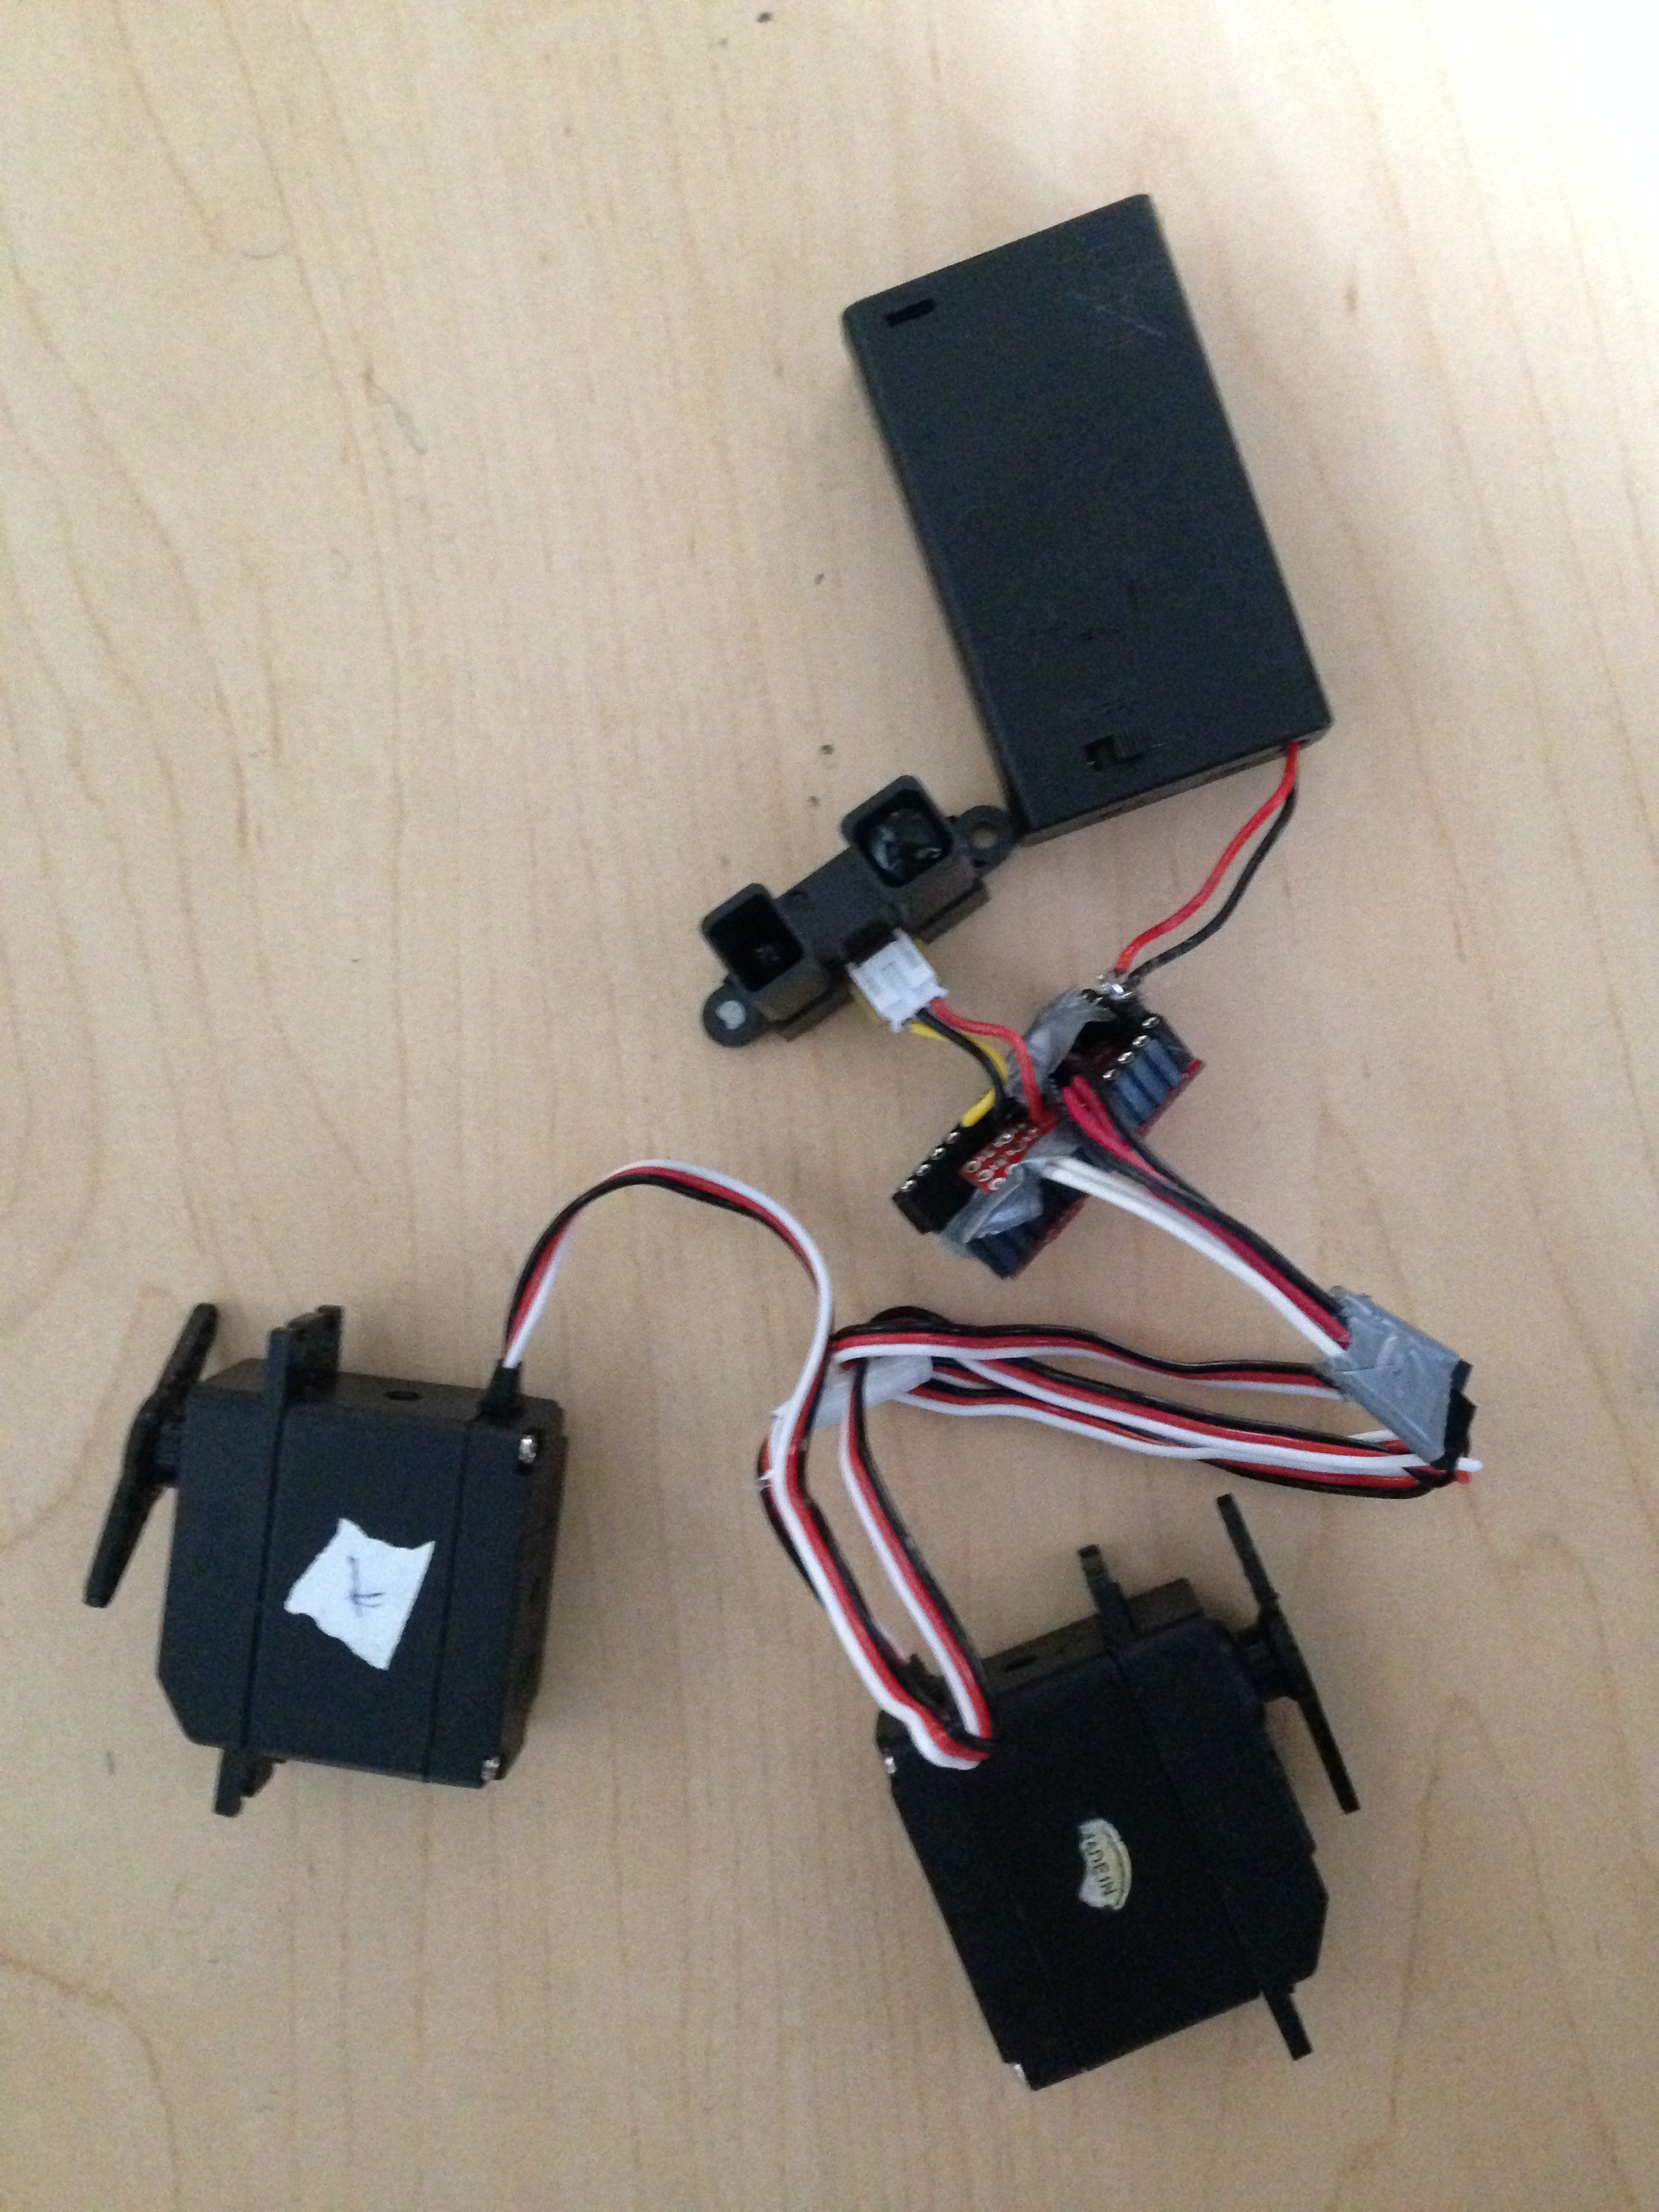
I coprocessed an Arduino Mini, two continuous rotation servo motors, a long range Sharp IR sensor, and a battery box into the print job. After pausing the print midway through, all of the components were placed inside the part, and the print was resumed and printed on top of the added components. The IR sensor was pointed at the top of the printer, so that it could record its distance away from the top of the printer. Because the MakerBots lower their build platforms when they finish prints, the sensor can detect when the print is done. Once the sensor recognizes that the build plate is fully lowered, the motors activate and the part drives off the bed, as shown above.
You’ll notice the print didn’t completely finish before it came off of the build plate, due to reading errors in the sensor. However, this representation of coprocessing can be used to show what the true power of additive manufacturing is, and how it can be used to create integrated assemblies like this one.

One of the trickiest parts to designing things like this is accounting build adhesion, which you may have seen as a common theme if you’ve read my last posts. The build plate is designed such that printed material will stick to it, meaning that the points of contact are extremely important. Because the printer is melting hot plastic, the plastic tends to shrink as it cools, causing some warping of layers. Warping propagates with complex cross sections, and with enough warping, the extruder head can catch on a warped piece and tear it off the plate. Keeping both of these in mind, the parts I designed needed to have low surface contact and relatively simple cross sections (at least initially) to prevent parts from peeling off the plate.

There are four components to this print. The two wheels, the main body, and the covering piece. The two wheels are slightly off-center, so that when the servo motors activate, the wheels pry both themselves and the main body off the build plate. The wheels have insets in them for the servo horn, such that during the coprocessing step, the horns slide into the wheels while the servo motors themselves slide into place in the main body. Screws are fastened through the wheels to attach to the horns.

The wires feed into a slot by the motors so that they can be constrained without getting in the way of the extruder head. With a little bit of finnicking with the wires, the Arduino and battery case slide into their respective places. The connection for the IR sensor can be fed through the a hole in the base of the part, where it can connect to the IR sensor that snaps into place.

The last step of the coprocessing involves taking the printed covering piece off of the build plate and placing it over the other components. This secures all components and covers the wires, and provides a new flat surface for the printer to print on.

Now that the system is live, the IR sensor reads the distance from the top of the printer. The print continues over the top of the coprocessed components while the sensor scans. The top of the printer is covered in paper so that the IR scanner can read it well. Once it reads anything greater than or equal to the distance from the bottom to the top of the printer, the motors turn on, wrenching all parts off the build plate and driving the robot off the build plate.

This demonstration of coprocessing shows that we can use the method to create integrated content. The printed robot is a fully integrated system, and it expands the definition of additive manufacturing and 3D printing to incorporate not just layers upon layers of material, but other systems and components as well.
Watch the video about this little robot here:
Happy printing!
-Alex
Follow @3dprinteraction
Bravo!!!!
Sent from my iPhone
>
LikeLiked by 1 person
Hey I saw that your work was featured on 3DPrint.com! Congratulations and keep up the good work!
LikeLike